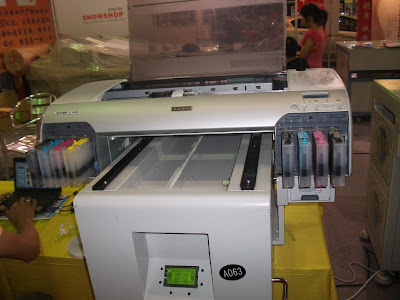
Flatbed UV Printer Control Panel Guide
Flatbed UV Printer Control Panel Guide.
How to setting the A2 UV flatbed printer on the printer countrol system.
now we are tell you to follows all function Button function:
1. PLATEN GAP
This is means: print head to the materials distance. we suggest:you set as “STANDARD”.
But : when printing , if the printed photo is not good quality , so you can choose “WIDER” Or”NARROW”
(Note: when you power off and power on the printer, this set is automatic to be “STANDARD”)
2. PAGE LINE
IF IT IS ON : so printer will printing a line on your design photo edge, ( we suggest set as “OFF”
3. INIT SETTNG
IF YOU PRESS THIS , SO THE PRINTER WILL BE AUTOMATIC TO SET ALL BUTTON TO BE “initialization” as factory
4. QUIET CUT
Please set it as OFF
5. AUTO CLEANING
This is for automatic to clear the head, please set it “ON” , so the printer will be automatic to clear head when the printer power on.
(Note: if you materials is small than 210mm , so please set it as “OFF”
6. AUTO HZL CK
This is automatic Head Nozzle checking, ( if you set as “NO” , so the printer will be automatic to check head Nozzle, .
(Note: if you materials is smaller than 210MM, please set it as “OFF”
7. SHEET SIZE CK
This is the automatic paper size checking, if you set it as “ON”, so the printer will be automatic to check the materials size.
Note: if you piece of materials is not march the printer printing size, so the printer will stop work , and show you “wrong paper size”
8. REFRESH MRGH
If you set it as “ON” so Printer automatically cut out the position photo.
9. CUTTER ADJ
If you set it “ON” ,so Can automatically adjust the print paper.
10. TIME OUT
If set as “30 second” “60 second”, so means : after the PC send printing data to printer, 60 Second no printing ,
so the print job will be auto to cancel. (Suggest set as 30 Second)
11 . PPR ALIGH CHK
set as "ON" ( so if the print paper not straighten, so the printer will be show " Paper not STRAIGHT",
Set as “OFF” ( so if you print paper not straighten, so the printer also printing)
12:PPR SIZE CHK
This is the automatic paper size checking, if you set it as “ON”, so the printer will be automatic to check the materials size.
(Note: if you materials weight or length is not correct to put on printer
so the printer will stop work, show you “re-load paper” or load paper.)
13. PAPER MARGIN
This is for 4880 epson printer installs the roll paper, so you can also set as DEFAULT
14. CODE PAGE
This is for display Language CODE
15. INTERFACE
When you set as “AUTO” so it has follows for you choose
CUTTER REPLACE : set as “UNABLE TO EXECUTE”
NET WORK : DISABLE
USB: ENABLE
head alignment : choose (0.1-1.6mm)
16. ALIGNMENT
SET AS “AUTO”. So the printer will auto to alignment to print line when printing


